How to Use Surface Hub v1 as External Interactive Display
The Surface Hub v1 was introduced in 2016 and came in two sizes: a 55” model and a much larger 84” version. These were designed specifically for team collaboration and ran a customized version of Windows called Windows 10 Team edition that primarily focused on meetings and whiteboarding. Each device features a multi-touch capacitive display with active pen support, along with integrated 1080p cameras, stereo speakers, and a built-in microphone array.
With support ending for the operating system that powers Surface Hub v1, the device can still be used by pairing it with an external PC. This approach offers a practical way to continue using the hardware, and may be a good option when:
- The internal PC no longer functions or fails to boot
- Preparing for Windows 10 Team edition’s end of support on October 14, 2025, by switching to your own managed Windows installation
- Running a more powerful or customized PC to handle modern applications
- Converting the Hub into a dedicated display for kiosks, creative work, or personal use
In the sections below, you’ll find detailed guidance for configuring Guest Mode and Replacement PC Mode to get the most out of your Surface Hub v1 with an external PC. For full technical specifications and additional details, refer to the official Microsoft Surface Hub connection documentation.
Connection Methods: Guest Mode vs. Replacement PC Mode 🔗
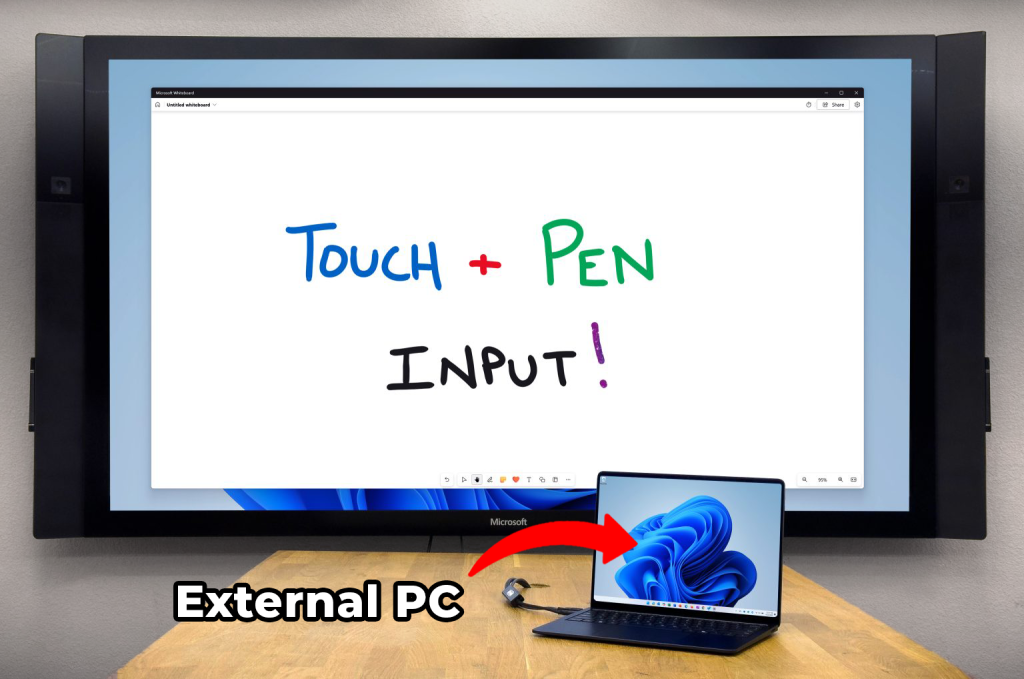
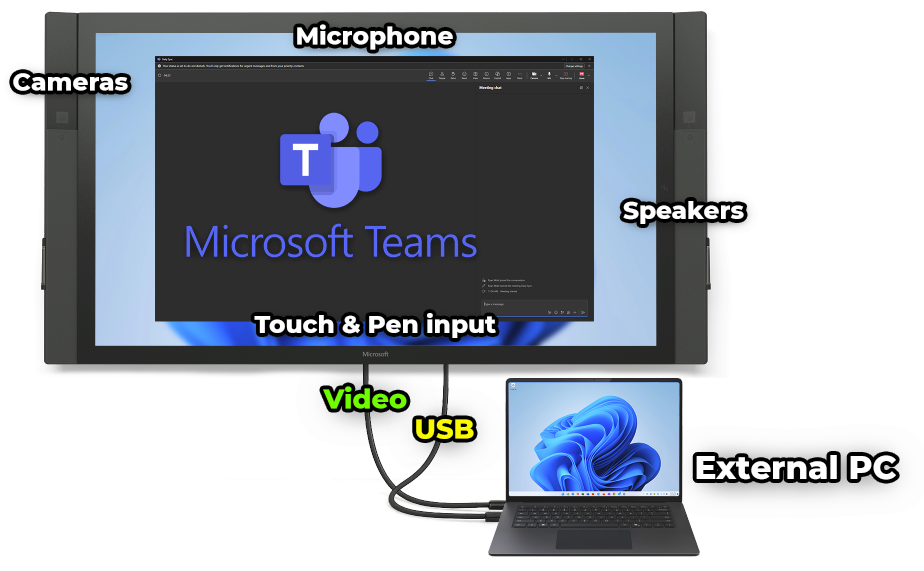
Surface Hub v1 can be used with an external PC in two main ways. Guest Mode is a simple connection that lets users plug in via HDMI, DisplayPort, or VGA, with a USB cable enabling touch and pen input. This is ideal for environments where multiple users need to connect their laptops on the fly for presentations or collaboration.
Replacement PC Mode disables the Hub’s internal computer entirely and routes all input and output to the external PC. This mode provides full access to the Hub’s display, pen, touch, microphones, cameras, and speakers, and is best suited for long-term use. To enable full functionality, the Surface Hub v1 drivers must be installed on the external PC.
Guest Mode 🔗
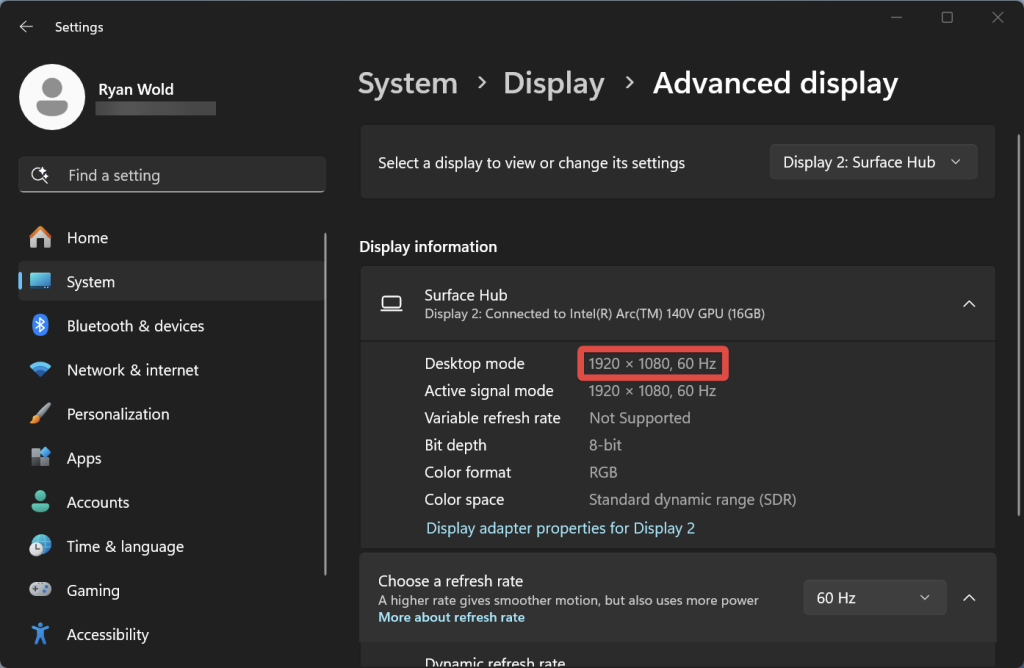
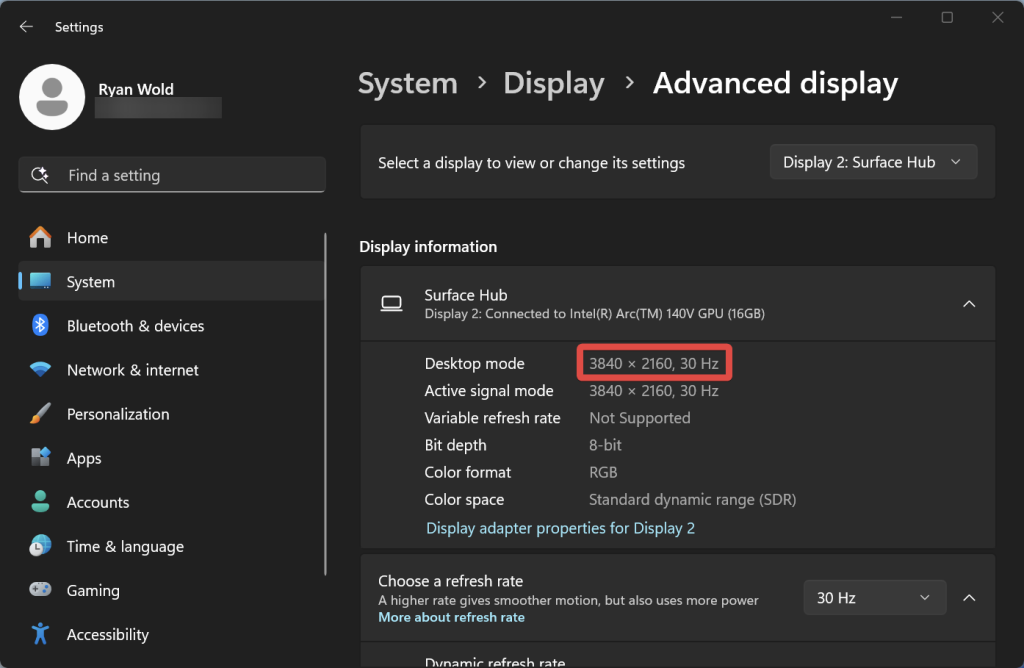
In Guest Mode, the maximum supported resolution is 1080p@60Hz on the 55″ model, and 4K@30Hz or 1080p@60Hz on the 84″ model. Guest Mode provides:
- Display output from the external PC to the Surface Hub screen
- Touch and pen input back to the external PC via USB
- Audio routing to speakers when DisplayPort or HDMI is used
Using Guest Mode 🔗
The following steps walk through how to wire the Surface Hub for Guest Mode and explain how an end user would connect their external PC to the device.
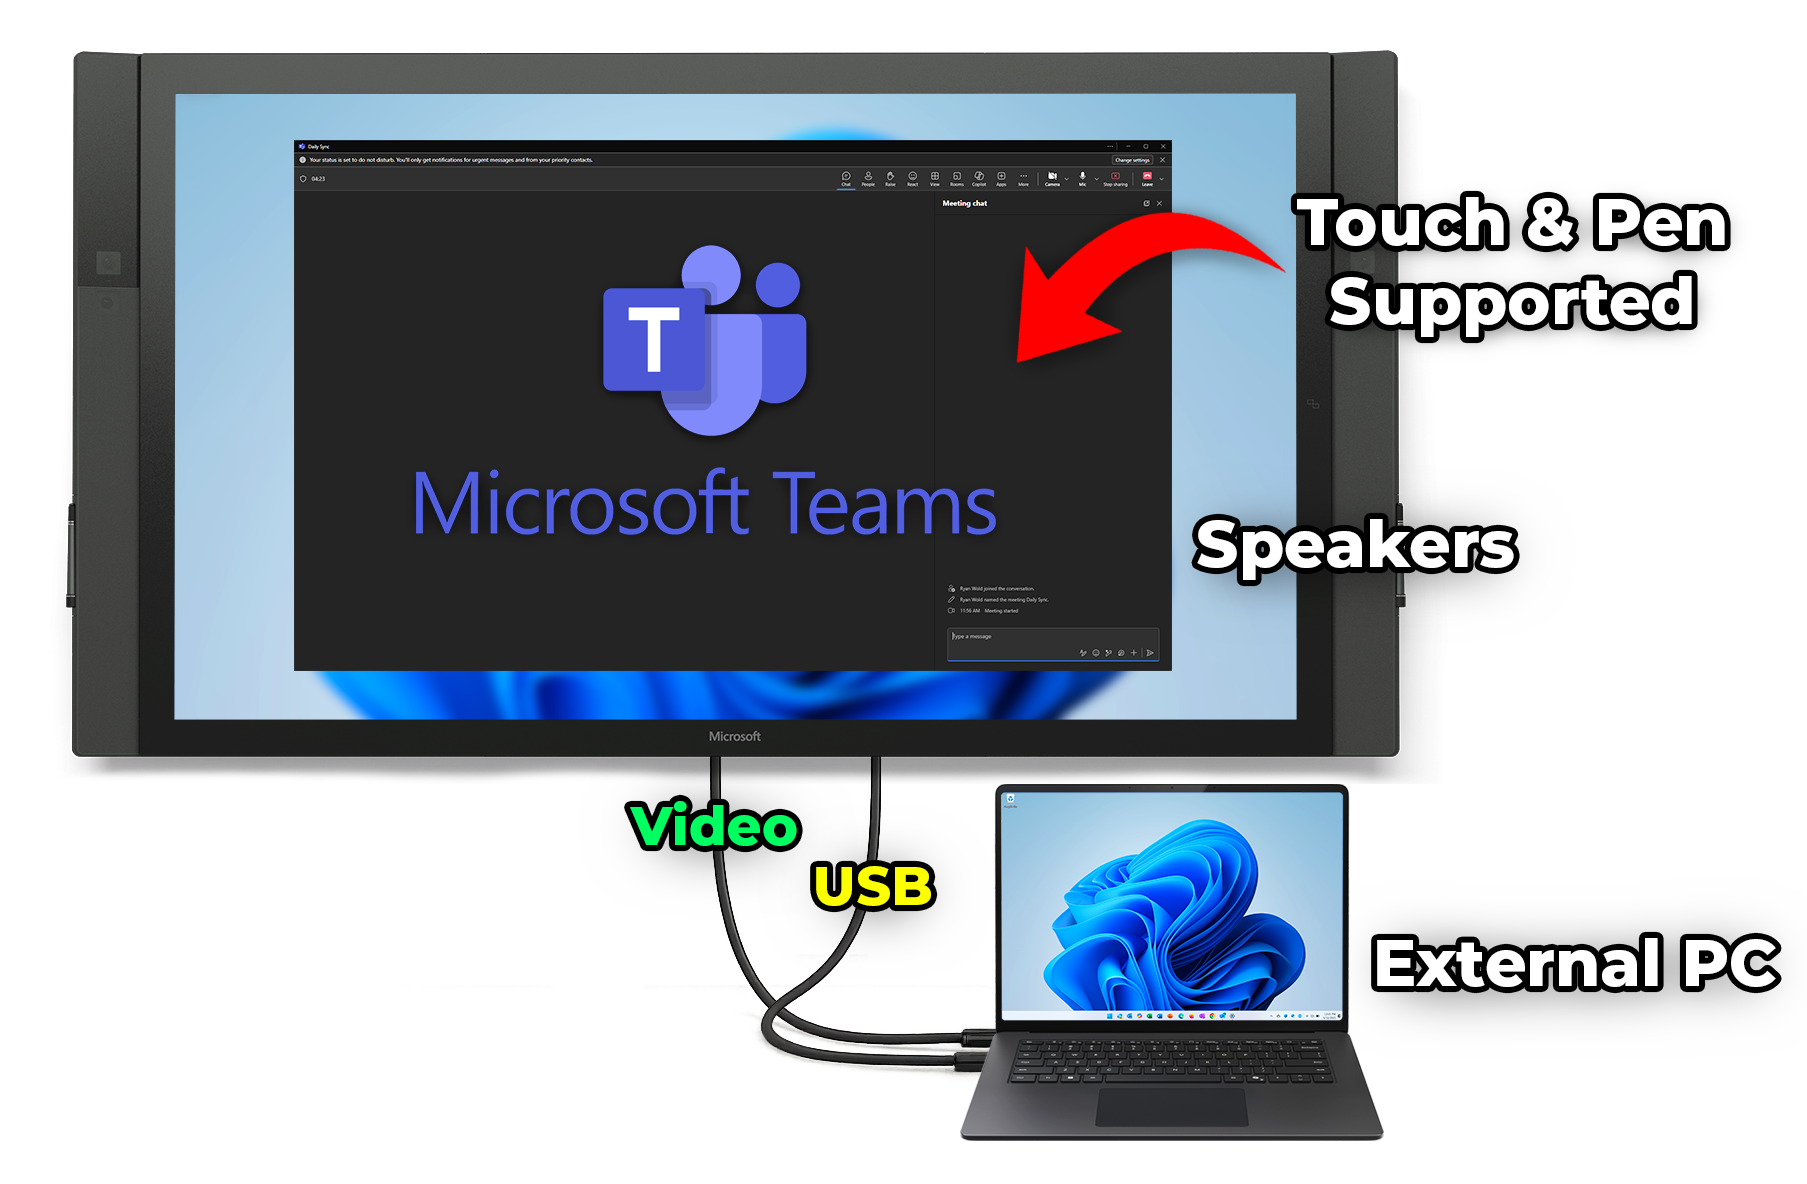
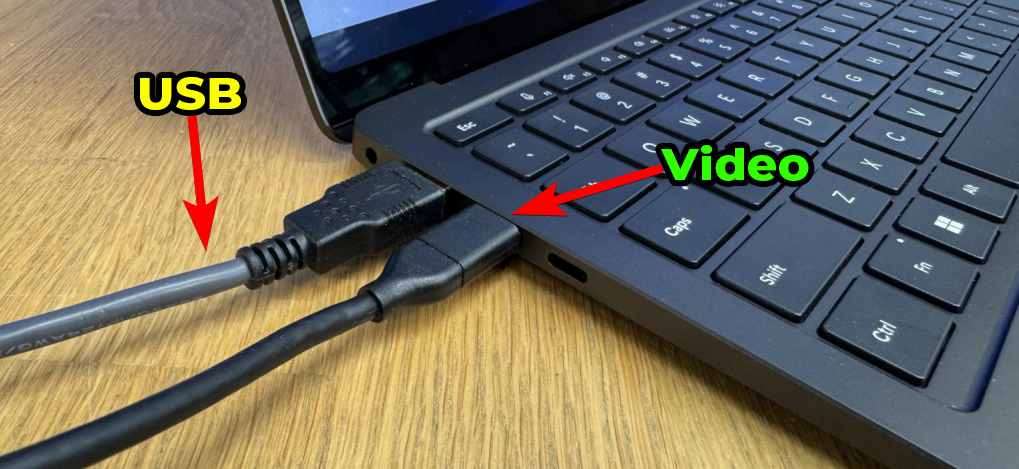
Step 1: Connect the video input
Connect a DisplayPort, HDMI, or VGA cable from the Surface Hub to your external PC’s video output. For best results, use DisplayPort or HDMI, as these options also enable audio playback through the Surface Hub’s built-in speakers.


Step 2: Connect a USB cable for interactivity (optional)
Plug a USB-B cable into the Surface Hub, then connect the other end to the external PC. This connection enables touchback and pen input from the Surface Hub.
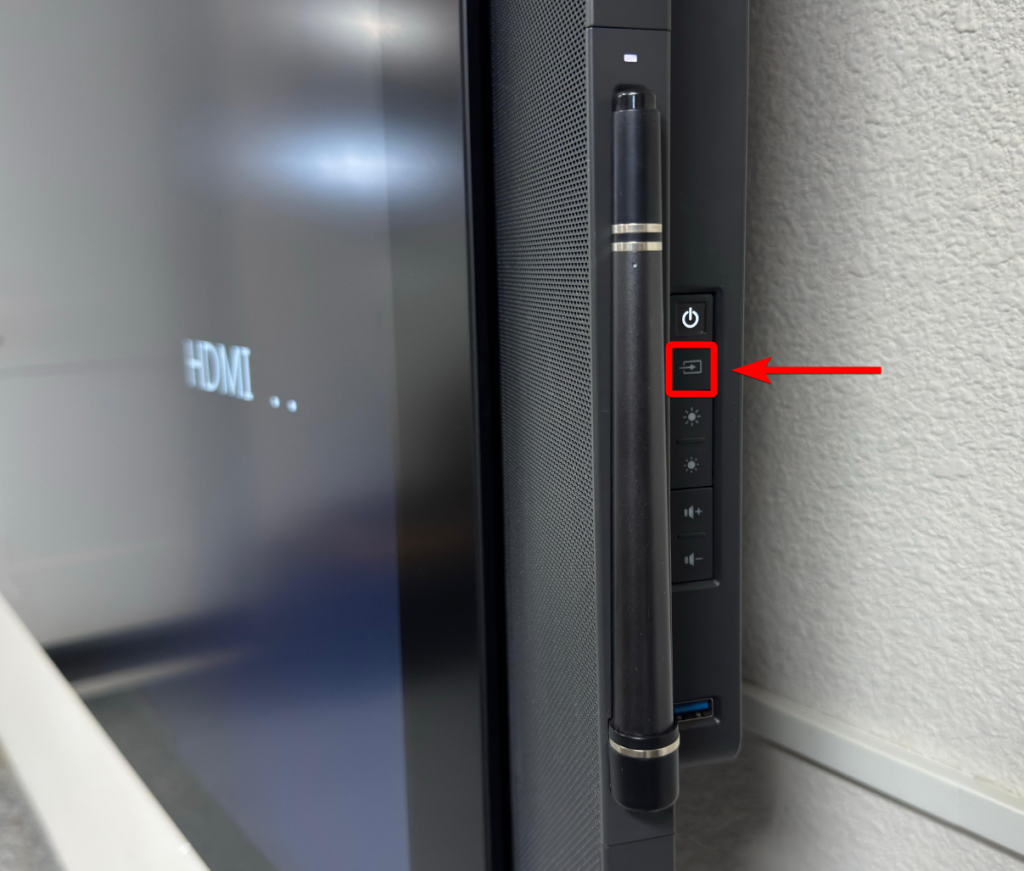
Step 3: Select the correct input on the Surface Hub
Press the source button on the Hub until it is set to the correct input (DisplayPort, HDMI, or VGA).
Step 4: Configure display settings on the PC
Set the PC to either extend or duplicate the desktop using the connected Surface Hub as a secondary display.
Touch and Pen Support:
When the USB cable is connected, touch and pen input should function automatically using the built-in drivers in Windows 10 or 11. No additional installation is typically required.
Replacement PC Mode 🔗
Replacement PC Mode disables the Surface Hub’s internal computer and allows you to use an external PC as the primary system. In this configuration, the Hub functions as an interactive external display with full support for:
- Multi-touch input
- Pen and inking
- Audio playback
- Microphone array
- Dual front-facing 1080p cameras
How to Enable Replacement PC Mode 🔗
To enable Replacement PC Mode, you’ll need to access a physical switch located on the bottom of the Surface Hub. This switch disables the internal system and allows the Hub to operate as an external display and input device. The steps below outline how to do this:
Step 1: Power off the Surface Hub completely
Shut down the Surface Hub by switching off the power rocker or unplugging it from the outlet. This ensures the mode change in the next step is applied properly when the device is powered back on.

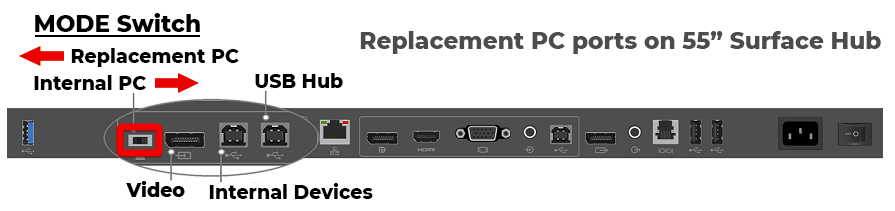
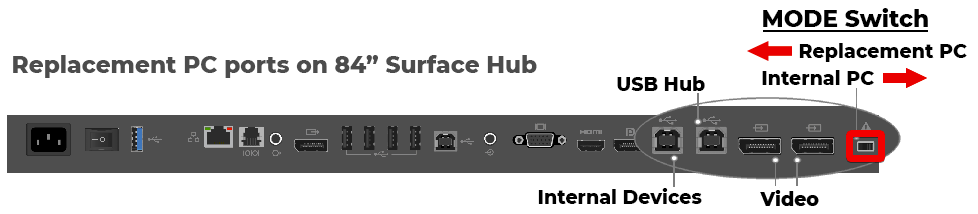
Step 2: Find the MODE switch
Look along the bottom edge of the Surface Hub chassis. The Mode switch is a small recessed toggle located on the opposite side of the power connector. If this is your first time accessing the switch, it may be covered by a plastic panel. Remove it to access the toggle.
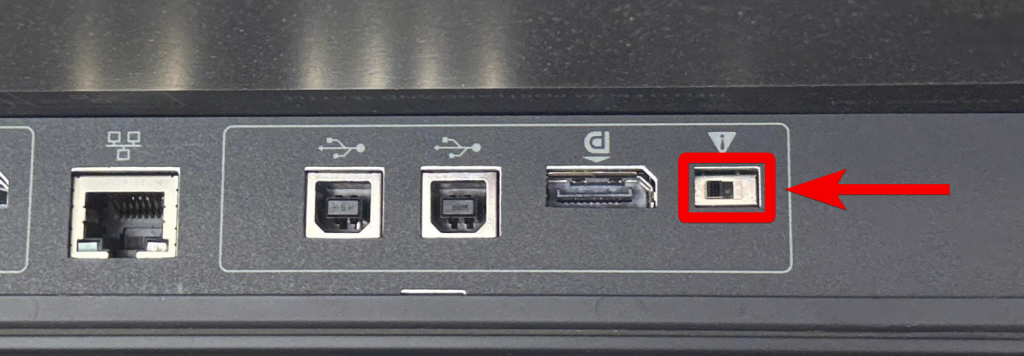
Step 3: Flip the switch to Replacement PC Mode
Move the Mode switch to the opposite position to turn off the internal PC.
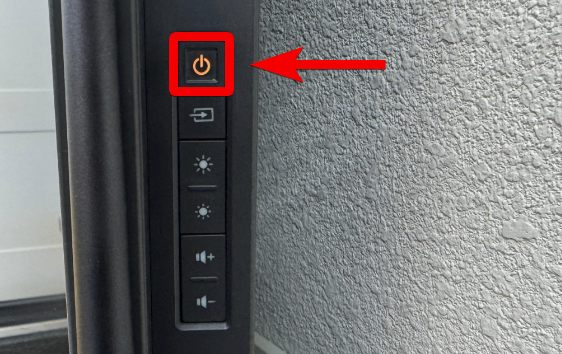
Step 4: Reconnect power and start the Hub
Reconnect the power cable or toggle the power switch back to the On position, then press the power button.
Step 5: Select the PC input source
Use the Source button on the side of the Surface Hub to toggle through the available inputs. Stop when you see the input labeled “PC” appear on the screen. This confirms the device is now operating in Replacement PC Mode.
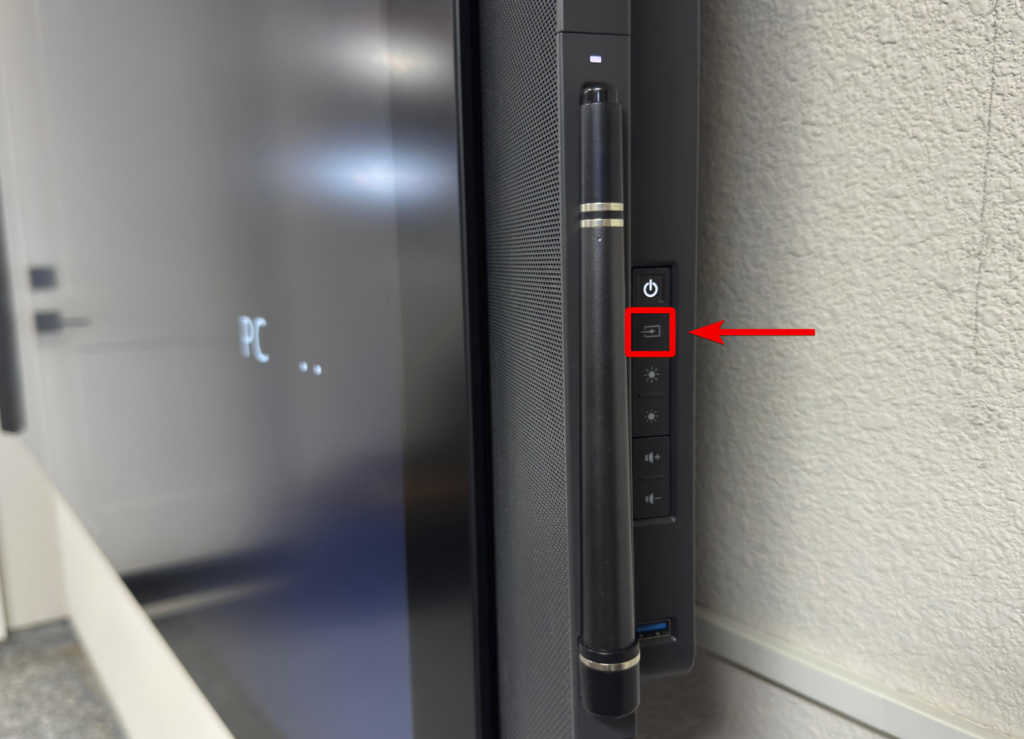
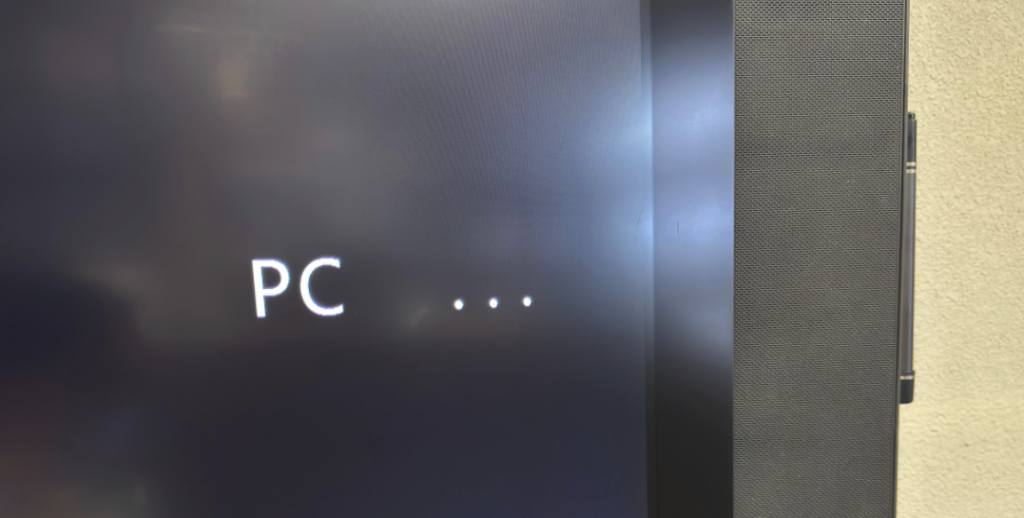
Note: If the input source sequence ends with DP > HDMI > VGA > PC, the device is in Replacement PC Mode. If “PC” does not appear, the internal PC is still active.
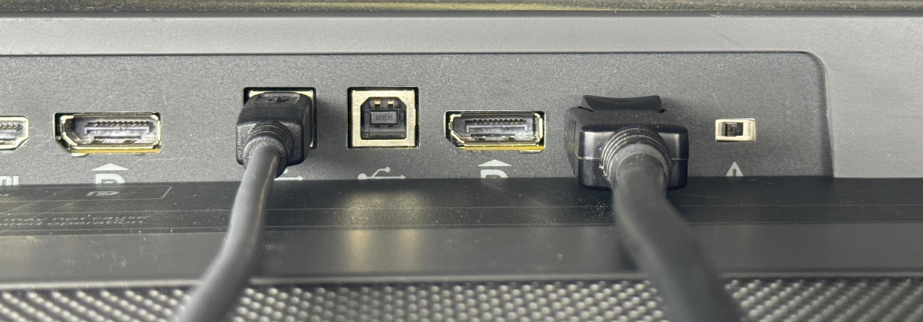
Step 6: Connect DisplayPort and USB cables
Connect a DisplayPort cable from the Surface Hub to your external PC for video. Then connect a USB Type-B cable from the Hub to the external PC to enable touch, pen, microphone and camera support.
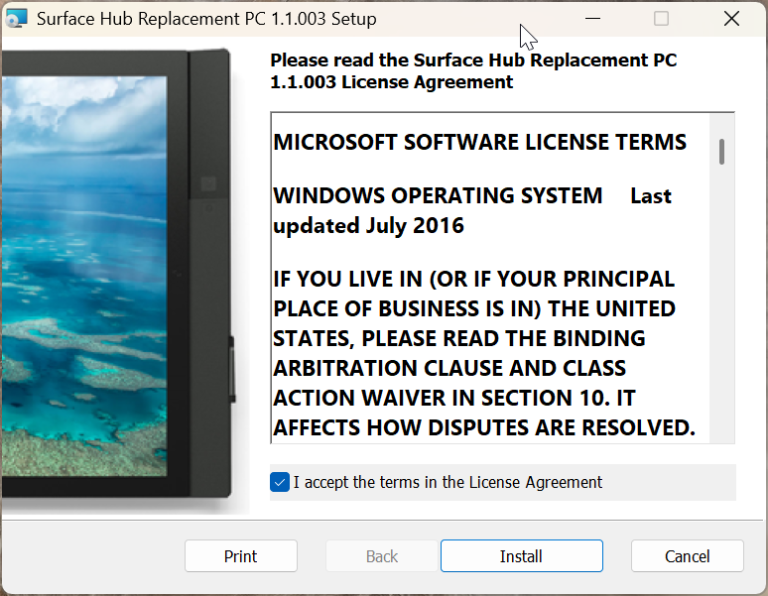
Driver Installation and System Setup 🔗
To ensure full functionality when using Replacement PC Mode, install the Surface Hub v1 Replacement PC driver pack on the Windows 10 or 11 device you plan to connect. These drivers enable support for the Hub’s cameras and microphone array and can be downloaded from the official Microsoft Download Center. Once installed, restart the PC if prompted.
Display Configuration for 84″ Models 🔗
The 84″ Surface Hub supports 4K@120Hz in Replacement PC mode, but only when using specific hardware. Most PCs will connect at 4K@30Hz using a single DisplayPort cable, which is acceptable for general use and conferencing. To achieve 4K@120Hz on the 84″ Surface Hub, you need the following.
- Two DisplayPort cables, both connected to the Hub’s dual DP inputs.
- A workstation-class GPU that supports NVIDIA Mosaic Mode (Quadro series) or AMD Eyefinity (AMD’s equivalent technology).
Mosaic Mode Requirements 🔗
Mosaic Mode combines two physical outputs into a single unified display, allowing the Surface Hub to operate at full 4K resolution and 120Hz refresh rate. This must be configured through the GPU control panel.
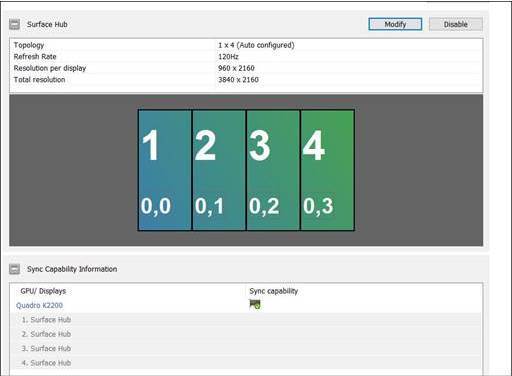
Important Limitation: Consumer GPUs like the NVIDIA RTX 3080 or 4090 do not support Mosaic Mode. Only workstation-grade cards with enterprise features (such as NVIDIA Quadro) are compatible.
DisplayPort Cable Recommendation
For either the 55″ or 84″ devices this Tripp Lite USB-C to DisplayPort cable works great. I tested the 6ft version of this exact cable and confirmed:
- 1080p at 60 Hz on 55″ or 84″
- 4K at 30 Hz on 84″
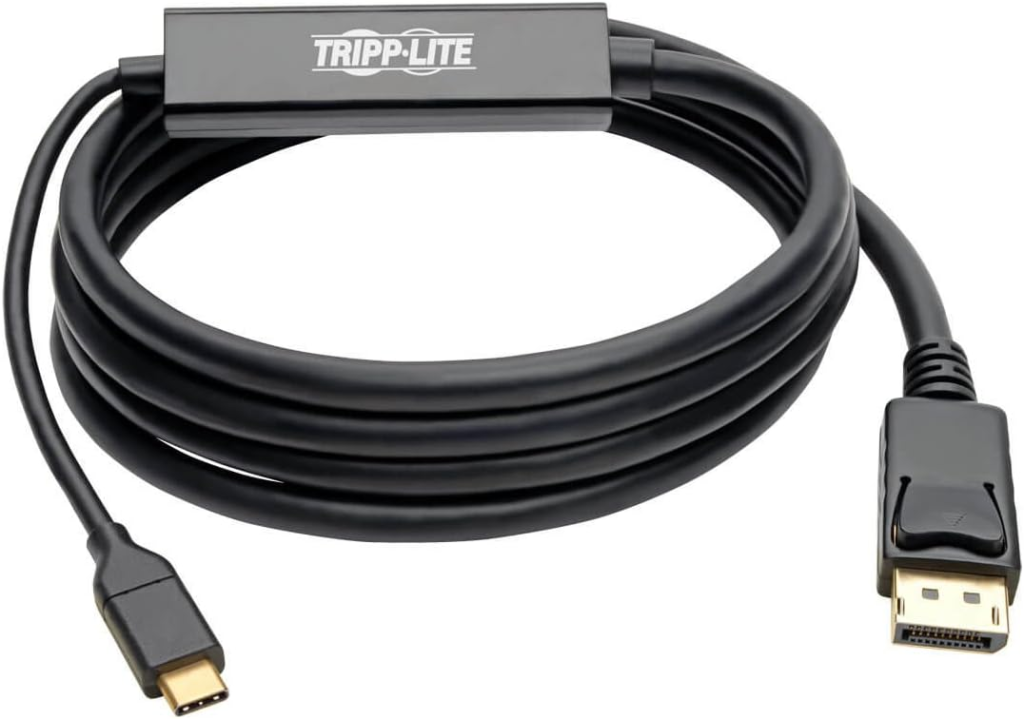
This works in Guest Mode and Replacement PC Mode with a single cable, and audio passes over DisplayPort.
Note: For touch, pen, and other peripherals in Replacement PC Mode, connect a separate USB cable from the Hub to the PC, as mentioned earlier in this post.
Conclusion
Using a Surface Hub v1 with an external Windows 11 PC gives organizations a practical way to extend the device’s usefulness beyond its original service life. Guest Mode offers a straightforward method for projecting a screen with touch and pen input and for environments that require more control, Replacement PC Mode allows full integration with the Hub’s built-in hardware by disabling the internal PC.